Blog

  • 0

Kitchen worktops – Things to consider when choosing yours

Once you start researching kitchen worktops,  you will find several things you’ll need to consider. However, we believe the two main areas to focus on should be how it will look and how it will perform.

How will it look?

What look are you trying to achieve? Modern, sleek lines? Traditional farmhouse style? What thickness will you go for? Do you want the same work surface throughout or two contrasting/complimenting surfaces?           

How will it perform?

How will you use your kitchen? Do you want a surface that can withstand hot pans or are you happy using trivets? How much maintenance are you prepared to do to keep it looking good?

Let’s take a closer look at some options for you to consider.

Glass

With so many colours to choose from, a glass worktop is the perfect way to add WOW factor to your kitchen and the reflective surface will create an illusion of more space. Being easy to maintain and looking fabulous, it is easy to see why glass worktops are becoming ever more popular. The glass can span in excess of 3½ metres with no joints giving a seamless, hygienic finish and overcoming the need for grout or silicone that some work surfaces require. It is one of the strongest materials available for work surfaces meaning you can allow for a breakfast bar overhang and it will stand up to the daily wear and tear of life in the busiest of kitchens.

Radius corners can be provided to remove pointed corners. Glass worktops are easily cleaned and very hard to stain with a matt finish being slightly more forgiving with fingerprints and marks but even a gloss finish will quickly return to its former glory with a wipe over using an ecloth. If you opt for glass, it is important to look for a fabricator that uses low iron glass. This has minimal green tint which keeps the colours bold and consistent.

Top Tip – There will always be some colour tone difference between different thicknesses of glass so make sure you view a sample in the same thickness as your chosen kitchen worktop.

Quartz, Granite and Ceasarstone

Quartz worktops are fabricated from natural quartz, one of the hardest minerals found in the Earth, to which resin and colour pigment are added. Being a non-porous material, Quartz does not allow bacteria to grow and is stain resistant, making it super hygienic and easy to clean. This means, unlike Granite, Quartz worktops never need to be sealed or treated. Aside from the durability that quartz provides, this material is beautiful and its wide variety of colour options are sure to catch your eye.

Your options are nearly endless as quartz ranges from natural colours such as whites, blacks and browns to other colours such as golds or blues. The design of a quartz worktop not only brings character to your kitchen but offers performance advantages that exceed other traditional materials. A good fabricator will offer you a number of different styles of edging depending on the look you wish to achieve.

Top Tip – Some manufacturers offer jumbo size slabs which are ideal if you’re choosing Quartz for a central island. Check with your kitchen designer if this is what you’re considering as a joint down the middle of your island can spoil the overall effect.

Solid surface

Solid Surface, as a material for kitchen worktops, has many advantages. Being non-porous, it will not stain as it will not allow any substance to penetrate the surface. This property also makes it hygienic, perfect for a kitchen worktop. It can be made and installed with seamless joins, making it ideal for large kitchen islands and long runs of worktop. It can be molded to any shape and sinks can be integrated into the worktop seamlessly, which not only looks beautiful but is also very hygienic. Whilst these worktops are fairly durable, they are renewable and repairable, so any accidental damage can be repaired bringing the worktop back to looking as it did the day it was installed.

Top Tip – When cleaning, use an anti-lime scale product. Whilst dirt and bacteria can’t stain the worktop surface, they can stain any build-up of lime scale thus giving the appearance of a dirty worktop.

Steel

Stainless steel worktops are the choice of professional chefs for a reason – they are extremely hygienic and very easy to maintain whilst also being extremely hard wearing. The thing that puts most people off choosing steel for their home kitchen is the aesthetics of shiny steel because we want our home to look attractive and inviting to our family and visitors, and we don’t want the visible scratches that will inevitably appear on a stainless steel worktop. None of which are considerations of the professionals.

However, some manufacturers now produce a stainless steel worktop with a tactile, velvety matt finish which is acquired by pummelling the steel with thousands of ball bearings during the manufacturing process. The end result is a beautiful steel worktop with all the aforementioned benefits of steel but with an elegant and calm appearance. This manufacturing process also makes the steel twice as strong as the conventional steel worktops and less susceptible to fingerprint marks.

Top Tip – Whilst using knives on your steel worktop won’t damage the surface, it will damage your knives so always use a chopping board for food preparation.

And Finally…

When choosing your worktop, talk to an experienced kitchen designer. They will have seen hundreds of different worktops in all the various materials and colours and in hundreds of different settings. This experience means they will be able to guide you as to what will look best and work well for you in your kitchen. They can talk you through the pros and cons of each material and offer valuable advice. You should visit a showroom where you can view and feel different worktop surfaces to see which you really like and to shake off any preconceived ideas you may have collected during your research.

Whichever worktop you choose, make sure you entrust the fabrication and installation to the experts. The effect a professionally templated and installed worktop will have on your whole kitchen will be well worth any money you might save by attempting a DIY job.

And our final Top Tip would be to follow the manufacturer’s guidelines on maintenance and cleaning products. That way your worktop will continue looking its best for many years to come.

  • 0
Kitchen Storage - By Alex

9 ways to get the most out of your kitchen storage

Tags : 

If there’s one room that absolutely needs to be organised, it’s the kitchen. And yet, so often, kitchen storage solutions elude us. But getting your kitchen back on track is actually pretty simple. Here are some handy hints that’ll transform your kitchen.

1. First, think about how you use your space

Whether you’re planning a kitchen from scratch, or overhauling an existing space, think about how you use your kitchen. Chances are, it’s a room you use at least twice a day, and possibly more. So above all, your kitchen needs to be functional, and storage is a key part of that. Think about your kitchen in terms of zones – a cooking zone (where your stove and oven are), a prep zone (usually your largest open bench space) and a food storage zone (your fridge and pantry).

Think about the way your kitchen is now, and how you could move items around to make it work better for you. Do you store your utensils near your stove, so it’s easy to reach for a whisk when you’re making a sauce? Where are your chopping boards? Ideally, they’ll be right under your largest bench space, so you can grab them easily as you prep food. For many of us, it helps to do a ‘full Kondo‘ and take everything out of our cupboards, and reorganise from here (you may also find items you no longer need – chuck them out for bonus storage space!).

2. Drawers before doors

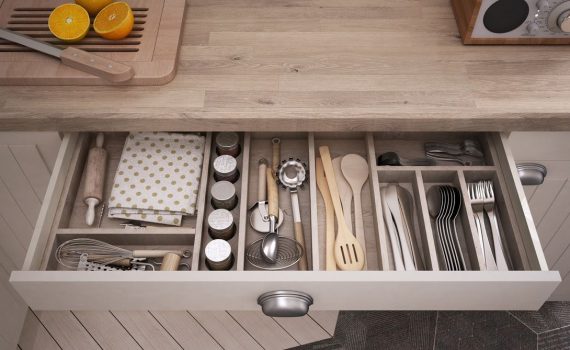
Ask pretty much any kitchen expert and they’ll tell you: drawers are king when it comes to storage. With drawers, you can easily see what’s in each space, and you can use the entire space (with cupboards, we tend to only use about half to three-quarters of the space – such a waste!). You can re-fit existing cupboards with drawers fairly simply.

3. Make your pantry work

For many of us, the pantry is like the Bermuda Triangle of kitchen storage: if we ignore it, it doesn’t really exist. But organising your pantry and adding a few nifty features to help it work harder for you will make prepping and cooking so much easier – we promise.

There are plenty of products on the market now to help you get your pantry in better working order. Contact us if you’d like some advice in this department. Think about rolling or sliding shelves that draw dry goods right out to you, two- and three-tier shelving units that can double your usable pantry space, over-the-doors hooks and rails, and baskets that clip onto the bottom of shelves to add extra storage and make reaching for that can of chickpeas a little easier.

4. Use every bit of space

Chances are, your kitchen has at least a little space that’s currently going unused (or at least underused). Have you got those odd tilt-down drawers just under your benches? Use them for sponges, spices, and cling wrap and foil. Got space above your cabinets? Place less frequently used items up there, like cookbooks, cake stands and large pots. How about the inside of your cabinet doors – reckon you could find space to hang a magazine file, to ‘file’ away your cling wrap, baking paper and foil there? Or maybe you could mount a magnetic strip for spices, or hang a chopping board.

And if you’ve been ‘blessed’ with awkward corner cupboards, think about using them in different ways. You could install a pull-out cupboard system which brings the entire contents of the unit into view when you open the door. Have a look around and see how much space you’re not using – and then think about ways you can put that space to work.

And don’t forget to make the most of vertical space!  You could hang chopping boards on walls, pot rails (which work for utensils and also small baskets which can hold fruit and veg), shelves for cookbooks, and even a peg board for miscellaneous items.

5. Install lighting inside your cabinets and drawers

Kitchen lighting isn’t just about those downlights you installed. Installing proper lighting in your pantry and other cupboards (or under cupboards) will allow you to see the entire contents of your cabinets at a glance. You can buy inexpensive battery-operated LED sensors lights that emit very little heat and are therefore safe around food.

6. Not everything has to go in the kitchen

If you’re short on space, think about items that don’t necessarily have to live in the kitchen. Barware, for instance, might make more sense living in your bar are. Cookbooks can go on a bookshelf in your living room. Cleaning items, like mops, might be better stored in the laundry. Again, it pays to be thoughtful about how you’re currently using your space, and whether you could put it to better use.

7. Hide clutter (aka the junk drawer…)

There are some things you simply can’t get rid of – your toaster, your kettle, your utensils – but you can hide them away. Banish clutter from the counter top by tucking everyday appliances such as the kettle and toaster behind sliding doors or inside discreet breakfast nooks (providing have enough properly located electrical sockets; if you don’t, these can be added by a qualified electrician). You could also cut down on bench space used by using a folding dish rack, a magnetic knife strip (eliminating the need for a block), or magnetic spice racks on the side of your fridge. And of course, every kitchen has a junk drawer…

8. Use organisers and dividers in your drawers

Save time scrambling through drawers for that elusive utensil by adding drawer organisers and dividers to all your kitchen drawers, not just your cutlery and junk drawers. Look for inserts that are modular and expandable to fit your drawer size and requirements exactly – and don’t forget non-slip drawer inserts that keep the contents of your drawers secure.

9. Get stackable containers and dispensers

Don’t forget to find a home for all the little things that can quickly clutter up your counter top. Clear glass containers allow you to organise and label your dry food and leftovers with ease, as well as keep tabs on how much you’ve got left. Square, stackable containers make the best use of space, and are available practically everywhere.


These are all important points that By Alex bears in mind when designing kitchens. Give us a call on 081 457 6698 You can count on us to innovate the kitchen of your dreams that’s not only beautiful, but functional too.


  • 0
Kitchen upgrade ideas - By Alex

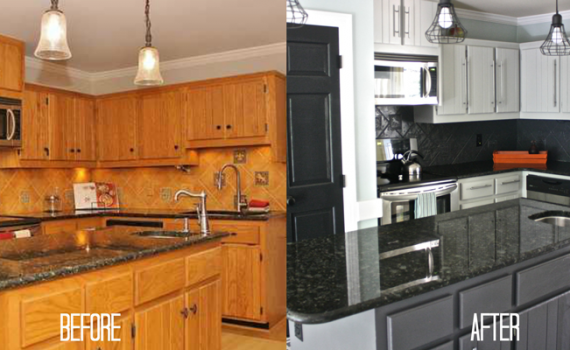
Affordable ways to upgrade an outdated kitchen

It’s officially that time of year: the festive season has ended, family and friends have gone, and your home looks likes a war zone. If your house is anything like ours, the kitchen seems to have sustained the bulk of the collateral damage. The worst part of the whole situation? The holidays have left a major dent in your wallet. But now is not the time for despair, because I’ve compiled a list of some of the easiest and most affordable ways to do a kitchen upgrade.

Sometimes remodeling your kitchen in true Fixer Upper style is the only option. But don’t think budget constraints mean that not much is possible. Here are a few simple tricks you can use to make the most of your kitchen upgrade.

Easy fixes

One of the easiest, and cleverest, ways to make your kitchen look like new is to reorganise your drawer, cupboard, and counter space. You’ll be amazed at what a little bit of de-cluttering and stacking can do. The best part? It costs you nothing.

Once you’ve organized your drawers, take your de-cluttering to the next level by tidying away small appliances and thoroughly cleaning work and storage surfaces.

Update your kitchen’s tired walls with inexpensive but bold modern art prints or family photos. Just choose your favorite, add a frame, and hang on the wall for an instant lift.

Next, stage your kitchen with a fresh cut bouquet of flowers, a bowl of fruit, or some homemade cakes or cookies and you’re all set.

Cosmetic changes

For kitchens that need more than a basic face lift, here are a few money saving projects that won’t cost an arm and a leg but will make your kitchen look brand-new.

A coat of paint can do wonders for any room in your house, but this is particularly true in the kitchen. Choose a neutral color that will go well with appliances and cupboards, and make sure your paint is of the highest quality so it will last longer.

Give your range a fresh new look with a shiny new oven hood If you shop smart, you don’t have to spend a lot of money here.

Change out your rusty old kitchen taps for a shiny new model. Bonus points if you choose one with an extendable hose!

It really is amazing what new lighting can do for a room. Switch out your old, outdated lighting fixtures and install something new and exciting over your worktops and dining table — and while you’re at it, make sure to use energy-saving LED bulbs.

If your kitchen cabinets and drawers are looking worse for wear but you can’t afford to replace them entirely, just change out the knobs and handles. These can be purchased at any home improvement store, so choose any style you like.

DIY/remodeling projects

Sometimes home improvement projects are about more than simply updating tired surfaces and fixtures. If you want to really get stuck in to your kitchen remodel, choose a DIY project where you can purchase your own materials and save on labour costs.

With a little extra time and a little bit more cash, you can replace your old cabinet doors with newer models without completely gutting your kitchen. If you don’t have the time, try re-staining the existing doors to give them new life.

Add a moveable island to larger kitchens to increase worktop and storage space. This will also completely change the feel of a room. Either buy one or make your own, if you’re itching for a full-on hands-on project.

Give your backsplashes a new lease on life with new adhesive tiles. Much cheaper than their stone, marble, and glass counterparts. Plus, adhesive tiles are inexpensive and very simple to install. Just make sure you’ve got your level handy.

Splurges

If for some strange reason you find yourself with a sudden windfall of spending money, your kitchen upgrade would definitely benefit from a few splurges such as new appliances and flooring. While this is not an affordable renovation solution, if you shop around during post holiday sales, you can find reasonable deals on these large but important purchases.


  • 0
Bathroom cabinetry - By Alex

Affordable ways to upgrade an outdated bathroom

Tags : 

You go to take a shower with the bathroom you have — not the bathroom you might want or wish to have at a later time. How happy are you with your current master bathroom? This should be your oasis; an escape from the drudgery of your workday, and a place to sink into soothing bubbles with a glass of wine and mellow tunes pouring from your iPod.

That can’t happen in a bathroom that is dingy, dank and depressing.

Are you ready to upgrade your outdated bathroom? Here are some affordable ways to make your restroom truly restful.

1. Buy used or imperfect

In a perfect world, you could be replacing your basin, countertop, tub, shower and even toilet. That can end up being an expensive proposition if you buy everything brand spanking new. Instead, be smart about your fixture purchases. Start with a secondhand shop; you might just discover a few used items that are in good condition.

As for your granite or marble counter tops, think imperfection. There will be many slabs of stone that are deemed imperfect because of minor discoloration. These slabs are also less expensive than pristine pieces. Suppose those imperfections are actually around the areas you’re going to cut out or place fixtures? You might not even see the problems, but could end up saving a bundle.

2. Bring in the heat

How many times have you gone into a cold bathroom and had your toes nearly encased in frostbite from the tile flooring? Maybe it’s not that severe, but it’s still a discomfort that diminishes your ideal bathroom. If you’re going to replace tiles with affordable options, you might want to consider adding propane heating for the floor. Utilizing propane for heat can actually save on energy bills. You won’t need to blast the whole house with heat when you just want a warm bathroom. Plus, this is an upgrade feature that can add significant value to your home.

3. Grout again

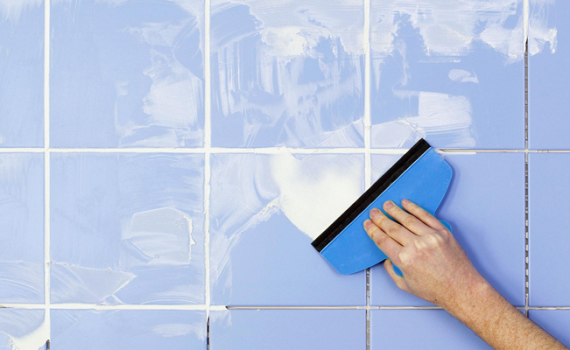
The grout around your tub, shower and basin could be looking a bit grimy. A great and affordable improvement is to scrape it up and lay down a clean line of new caulk. It’s a perfect way to freshen up the bathroom, especially if you’re not going to swap out the tub or basin.

4. Think green

As long as you’re upgrading, you might want to think green with regard to your toilet and shower head. Low-flow is the way to go, and it will help you save money on your water bill. Just remember to also check your water regulator, which is where your water is piped into the house. Lowering the pressure from that point will also not only save you money by reducing water flow, it will also protect your pipes.

5. New cabinetry

Sometimes cabinets in the bathroom can warp and expand due to excess moisture in the air. This can really look ugly! You can opt for brand new ones in a more modern finish, but you can also just replace the doors and handles. Get creative! Use glass or mirror, or a bright accent colour to uplift the spirit of any old bathroom.

6. When in doubt, repaint

Finally, the most affordable way to redo a bathroom is to give it a fresh coat of paint. Two things to avoid:

  • the color white
  • any paint that isn’t a high-quality satin finish

When repainting a bathroom, you want to take extra care to tape off all the areas you’ll need to paint around. That high-quality satin finish will also be a good protection against mold or mildew, as it tends to repel moisture.

As for the color palette, you have a wide world of choices that can provide a splash of personality for your bathroom. White is OK, but it’s also very sterile and, some may say, boring. Express yourself!


Once your bathroom upgrade is complete, make sure you take some time to enjoy it all — because it’s a safe bet that the kitchen will be next!


  • 0

5 Things to know before you attempt a kitchen renovation

Tags : 

If you sometimes have trouble deciding what to make for dinner, a kitchen renovation can feel paralyzing. But listen up: It doesn’t really matter much which backsplash tiles or tap you choose. As long as you get the big stuff right, you’ll be thrilled with your new kitchen.

These five rules will help you get the best result at the right price.

1. Keep your outlay in sync with your home

To avoid over-improving, it’s a good idea to cap your kitchen renovation budget at 15% of your home’s value. For budgeting purposes, figure about 30% on cabinets; 14% on appliances; 10% on counter tops; 5% on lighting; 4% on plumbing fixtures; 2% to 3% on paint; 1% to 2% on tiles, and 35% on construction costs, such as windows, flooring, and labour.

2. It pays to pay for your design

There’s no such thing as a free lunch—or a free plan for renovating the place where you prepare lunch. While the designers at home centres, kitchen stores, and cabinet shops won’t charge you a fee, they aren’t working for free. Their paycheques come from the retailer or manufacturers of the products they’re selling, which limits your choices. What’s more, in-store designers, especially those working at home centres, tend to be relatively inexperienced with actual renovation work.

Since your project will only be as good as its design, skip the freebies and hire a qualified designer without any conflicts of interest. Expect to pay 3 to 10 % of your project costs for design—a fair price for a design that really works.

3. You can expand the kitchen without busting the budget

Unless your house was built within the last few decades, your kitchen is almost certainly undersized. If you’re doing a major renovation (in other words, tearing things out and starting over), now is the time to expand the kitchen; here’s how to do it affordably.

  • Steal space. By repurposing square footage from an adjacent hallway or a no-longer-needed chimney, closet, or patio, you can expand your kitchen at perhaps half the per-square-foot costs of an addition. Exactly how much you’ll pay depends on the project and location, but you’ll probably pay a whole lot less for a renovation than you would for building new.
  • Open the floor plan. Even if you don’t expand the kitchen at all, you can make it feel much bigger by taking down a wall and creating an open floor plan between the kitchen and adjacent dining, family, or living room.
  • Bump out. If you need to expand, you may be able to add a two-foot extension along one whole side of the kitchen by hanging it off the house like a bay window rather than putting it on a foundation. That could save you several thousand rand compared with a full-fledged addition.

4. To cut costs, hold on to what works

You can slash the price tag for any kitchen renovation by limiting how much of the old kitchen you replace. Keeping original windows is a great way to save costs. Keeping the original wood floor hiding underneath all of those layers of linoleum and vinyl could also save you money. And simply keeping the plumbing fixtures and appliances in the same locations likely means you can reuse existing plumbing, saving you money too.

5. Stay skin deep if you’re moving anytime soon

If you expect to put your house on the market within a decade, skip the expensive renovation and go for a cosmetic upgrade instead. You can have old cabinets painted for refaced with a new wood veneer and new doors and drawer fronts made. New taps and fresh cabinet hardware are great ways to upgrade; and even replacing Formica counter tops with granite is a great idea.


Whatever your renovation job, big or small, we’ve got all the tools to craft you the upgrade or the rebuild of your dreams. Contact us for an obligation free quotation.


  • 0
by-alex-kitchen-planning

7 Practical things to remember when planning your kitchen

Tags : 

The kitchen is the heart of every home. It’s where birthday cakes are decorated, Sunday night’s roasts are carved, Christmas lunch is served and where all the best family secrets are spilled! But what good is a kitchen if it is not practical? When it comes to renovating a kitchen, people worry too much about the aesthetic, and not enough about the functionality. From the placement of your bin, to the overhang of your breakfast bar, here are some practical things to keep in mind when designing your kitchen.

1. A breakfast bar overhang

Kitchen islands with bar stools are must-have commodities in modern kitchens. These breakfast bars are the perfect way to separate the living area from the kitchen, while maintaining an open living environment. Parents can cook dinner and keep one eye on their kids as they do homework, and friends can sit and have a glass of wine while their hosts cook. If you are planning to include a breakfast bar in your kitchen, ensure you include an overhang on your island. This will provide legroom for those sitting on the bar stools.

2. Close dishwasher and sink placement

If you wish to avoid dripping food and grease on the floor, place the dishwasher within arms reach of the sink. That way, when you rinse the excess food off plates, you can place them straight in the dishwasher. Otherwise you will have to travel across the kitchen dripping dirty water as you go, and I am yet to meet anyone who enjoys mopping the kitchen floor! It is also important to place the dishwasher by the sink in order to connect the dishwasher plumbing to the drain and taps.

3. Bin location

The kitchen bin is not only used for food scraps and packaging. More often than not, it is used for everyday household rubbish that is collected around the house. For this reason, it is useful to place the bin at a point in the kitchen that is easily accessible from the rest of the house. I suggest placing it on the end of the bench or island, closest to the kitchen entrance. That way, you can simply throw something in the bin as you walk past, rather than walk into the kitchen and get in the way of the chef! As for a compost bin that you can keep as close to your food prep area as possible.

4. Dishwasher location

Designing the layout of a kitchen is a little like solving a Rubik’s Cube. Earlier, I mentioned that you should always place the dishwasher near the sink for plumbing reasons. Well, with that in mind, you should not install your dishwasher next to a wall. This will greatly limit your access to the dishwasher and make it very difficult to pack and unpack, as you will only be able to access it from one side.

5. Power points in the cupboards

Gone are the days of storing your toaster and kettle on the kitchen bench. The trend these days is to hide your appliances away in a cupboard. To this end, you need to ensure you plan for electric sockets to be installed inside your cupboards, so your appliances can actually be plugged in. I would suggest installing more than one double socket, as we are using more and more appliances these days. The humble toaster and kettle don’t cut it anymore – we have coffee machines, mix-masters and food processors. So install two double sockets so you can have all your appliances on the go!

6. Adequate lighting

The kitchen is the most likely room for accidents to occur, and it’s no wonder! Hot plates, sharp knives, and gas stoves can all be household hazards. It is for this reason that good lighting is essential in the kitchen. Consider a combination of ceiling lights, under-cabinet lights and pendant lights. Down lights provide general lighting in the room and illuminate the entire space. Pendant lights, on the other hand, provide more focused light. If you have benches underneath hanging cupboards, you might also like to consider under-cabinet lights. This will ensure those dark corners will also be illuminated. Above all, think about where you are going to need light at all hours of the day. Stay up late with friends? Choose dimmable lighting over the dining area. Cook on the island bench? Choose task lighting to shine directly on your prep zone.

BONUS TIP: When installing pendant lights, ensure you position them so the light falls in front of the food preparation area, rather than behind, as this will cast shadows over your workspace.

7. Space between counters

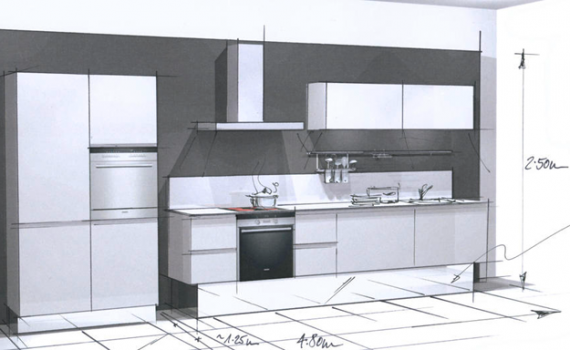
When designing a kitchen, it is recommended to leave a minimum of 1000mm of floor space between your two bench tops. This will allow room for you to open drawers and cupboards, as well as stand in front of your dishwasher when it is fully opened.

Alex’s passion for detail will ensure that your new kitchen ticks all the boxes and more, leaving you free and inspired to unleash your inner masterchef!


  • 0

9 Tips for choosing the right kitchen splashback

Tags : 

Kitchen Splashbacks can be a great standout feature in any kitchen. When choosing the right Splashback, it needs to not only complement the design and style of the kitchen, but also be practical enough to withstand everyday use.

We understand with the endless styles and options available out there that it is easy to start feeling overwhelmed with choice options. That’s why we have put together these 8 simple tips to assist you in narrowing down your ideas, allowing you to pick the perfect Splashback for your beautiful new kitchen

1. Recognise your budget

The first step in your kitchen makeover planning process is to have your budget clearly set out. The material, size and layout that you select are going to make a big difference on the final cost. Be sure to have your budget in mind first and foremost when going through your decision-making process, so that your chosen Splashback falls within your budget.

2. Align with your kitchen’s style

An important factor to keep in mind when choosing a Splashback is to ensure it will align with the overall style of your kitchen. This doesn’t necessarily mean matching your benchtop and cupboards – but it does mean that they should all complement one another.

Available options include Splashbacks which are traditional in style, and others that will give your kitchen a more modern look and feel. If your Splashback is going to be the focal point in your kitchen, you will likely work backwards and chose your benchtop and cupboards based on the style of your Splashback.

3. Select the right material

Are you aiming for a rustic-brick look? Clean-white polished tiles? Traditional kitchens often use tile or stone, while modern kitchens are incorporating glass, copper, prints and stainless steel. Tile is one of the safest and most versatile options that can work in almost any kitchen design.

Alternatively, using a matching material such as stone on both your Splashback and benchtop can be both a practical and visually appealing option, creating a stunning streamlined look. You want to decide on a material that both looks good and is durable enough to handle everyday cooking splatters. Below is a list of commonly used Splashback materials:

Tile – Versatile, easy cleaning
Glass – Modern, sleek
Acrylic – Similar to glass, cost-effective
Stone – Elegant, streamlined look
Mirrored Glass – Reflects light, adds size, contemporary
Pressed Metal – Modern, engaging design
Stainless steel – Very current, durable

4. Pick the right colour

Do you want your Splashback to blend in with the tone of your room? Or do you want it to take centre stage?

Choosing colours that have a similar tone to your other materials will give a uniform look. Alternatively, choosing a contrasting colour can make your Splashback a decorative focal point. Also, light colours can create an open and bright feeling, while dark colours will allow for food splatter to be less noticeable. Naturally the materials and colours you have chosen for your benchtop and cupboards will impact your colour decision.

5. Keeping it clean

Certain Splashback materials can be more difficult to clean than others, and may require a special cleaning agent. While some materials may look magnificent, cleaning them can be a hassle. If your kitchen gets plenty of use with lots of spills and splatters, you may lean towards choosing a material that is easy to clean, such as a large ceramic tile with minimal grout lines.

Glass can create a very sharp looking kitchen, though cleaning it to a flawless finish every day can be challenging. Tile on the other hand is very easy to wipe clean, but the grout can stain more easily over time.

6. Try a mirror Splashback to make the kitchen feel bigger

A mirrored Splashback is a bold move, however it can really help to open a kitchen up and give the impression of a much larger space. This can look particularly elegant in smaller kitchens to help open them up, or in kitchens where you have a beautiful open home view to be reflected. It is important to note that mirrored Splashbacks should be avoided where there is little natural light.

7. Use a window Splashback to add light

If your Splashback happens to fall on an outer wall of your home, you may have the option of turning your Splashback into a window. This is a great opportunity to add in extra light, especially if your kitchen lacks natural light. This option requires significant advanced planning structurally, but when prearranged can be an impressive element in a kitchen.

8. Be bold with a printed Splashback

If the aim of your Splashback is to make a bold statement, an option is to use a feature print, such as marble or a printed image. This style can complement neutral benchtops and cupboards nicely, and can add a unique, decorative element to your kitchen. Using a printed or geometric Splashback is a great way to compliment neutral surroundings and really add that wow factor to your kitchen.

9. Don’t choose just yet

When in doubt, simply hold off on selecting your Splashback right away. We understand it is sometimes difficult to visualise exactly how a Splashback will look during the planning stages.

By partnering with an experienced kitchen design company such as ByAlex, you will be able to get expert advise on what Splashback designs and materials are available, and what will look the best for your kitchen design.

ByAlex are innovative professionals, specialising in kitchen design on the Garden Route. To see some of our work, click here have a look at our gallery. To go to our contact form click here. Our friendly renovation consultants would love to hear from you!


  • 0

Top tips for sorting your garage

Alex an expert when it comes to organising garages and sheds. “When everything’s in its place”, he says, “you know exactly what you have and can find things quickly.” So set aside a day, organise a skip bin or council rubbish pick-up (you’ll need it!) and get started.

Make a plan

Apart from cars, what large items or permanent workspaces do you need to fit in? Think workbenches, chest freezers, potting benches and the like. They’ll need to go near powerpoints or under good lighting.

The space around those items is perfect for storage. Create “zones” for each work area, such as gardening outdoor items, sports and seasonal items. Measure the space and sketch where your storage will go and take a ‘before photo’ to help identify what you have to organise.

Storage options

Get as much off the ground as you can. If you have exposed rafters, move any large, lightweight items up and away. On the walls, you can use anything from simple S-hooks to integrated wall track systems with moveable hooks. They are flexible and can be added to or rearranged to meet your ongoing needs.

Shelves are another off-the-ground option, plus they make it easy to see what you’re looking for. Look for rugged shelves that are quick to put together, consider the maximum load they’ll take and use co-ordinated shelves for a uniform look.

Cupboards and drawers are great for hiding clutter. Have at least one that’s lockable to safely store chemicals. Add heavy-duty castors to easily move them later.

Buckets or caddies are perfect for small hand tools, especially those you use regularly. Store tools for a particular job (think painting, pruning, spraying) in one spot.

Get stuck in!

It’s time to make your vision a reality. Ask friends to help you on the day, or break it down and do it one a section at a time.

  1. Move everything outside and start your rubbish and recycling piles. Now give the area a good clean.
  2. Put your permanent workspaces and large items in place. Put your plan up on the wall and consult it regularly to stay on track!
  3. Position your storage solutions around your workspaces. Affix shelves and cabinets to the walls now before you fill them.
  4. Add everything else back in, keeping similar items together in each “zone”. Label boxes as you go.

Job done! Sit back and enjoy your organised workspace. Or now that you know where everything is… get to work! If all of this just seems like way too much for you, By Alex has the perfect solution. Contact us to find out what we can do for you.


  • 0
garage-storage-ideas-by-alex

Create your own garage storage plan

Tags : 

There’s untapped potential in any garage to make room for more storage. Here are some rules you can apply to make the most out of your space.

Clear out

Weed out all the junk you don’t need. Keep only what you use; give away what you don’t, and throw away what’s broken and taking up precious space.

Make a plan

Treat your garage like any other room in the house. Take measurements and draw a floor plan to help you visualize what will fit and where it can be placed, just as you would for a kitchen or a dining room.

Categorize

Decide what items you’ll use often, like garbage bags and cleaning supplies. Keep these things nearest the door. Next, map out space for seasonal equipment: lawn mowers and weed-trimmers, etc.

Avoid placing big items like lawn mowers, in a corner where they’ll chew up space. Try to park them under a shelf unit. And be sure to clip ladders, shovels, rakes, and other garden tools into a wall rack off the floor.

Finally, get seasonal space hogs such as kayaks and bikes off the floor. These items should be relegated to walls or hung from the ceiling. A hoist pulley system (available at most home depots or online) that operates like the cords on window blinds and has clips or straps to hold large items can be installed directly into ceiling joists.

Containerise

Keeping things in containers not only lets you get them off the floor but keeps them clean. Transparent stackable bins conserve space and also allow you to see their contents. Always label opaque containers so that you know what’s inside.

Safety-proof

Designate a safe space for hazardous materials such as fertilizers, pesticides and paint, so kids can’t get into them. Hang sharp gardening tools up out of reach, and chain saws and other sharp tools stored in locked boxes.


By Alex has a storage solution to suit every problem. If you don’t know where to start, why not contact us to tailor make one especially for you.


  • 0
de-clutter-by-alex

De-clutter your home: The 10 most important principles

Tags : 

It is possible to reign in the chaos and maintain a neat, clutter-free home. Just apply these 10 principles.


1. Stop the flow of stuff coming in

De-cluttering is a waste of time if you simply replace the old stuff with new. You’ll need to begin by slowing the flow of things entering your home. Determine today to buy less. Trust me, you won’t regret it. The freedom from desire to acquire is a beautiful thing.

2. De-clutter at least one item a day

De-cluttering does not have to be a mad frenzy that disrupts your entire household. Over the years, my home has become quite minimalist by simply choosing one item a day to de-clutter. This gradual process began to change the way I think about stuff. Eventually, it became a way of life rather than just a crash diet of stuff.

3. De-clutter the easy stuff first 

There is no need to make things difficult by trying to de-clutter the hardest things first. Most likely, it will simply deter you from the task altogether. Instead, start with the easy stuff and then as you strengthen your will to reduce, the harder decisions will become easier.

4. Put a disposal plan in place

Before you begin, investigate selling, recycling, donating and give away options for the items you choose to de-clutter. The more prepared you are for the task, the simpler it will be… and the more likely you will be to follow through. PAWS, Hospice, and our local second-hand shop became my favorite disposal options. However there are endless others to explore.

5. Don’t keep things out of guilt or obligation

Your home should only contain the things you love or use. Don’t let incorrect thinking or other people dictate what you should keep or give away. Remember, if the items are yours, it is your choice to decide what to do with them.

6. Do not be afraid to let go

The urge to hold on to items you think you might need someday can be eliminated simply by being realistic about what need really is. Many items in our homes may be useful, but they are not particularly necessary to our happiness, well-being, or the functionality of our homes. Seek to understand the difference.

7. Gifts do not have to be material

There are so many ways to honour loved ones without giving gifts that end up as clutter. Encourage people to follow this concept when buying gifts for you. Some alternative gifts are gifts of experience or adventure, a gift of time spent together, even cash gifts are appropriate in some instances.

8. Do not over-equip your home

A home does not need enough linen, crockery, cutlery, or pantry supplies to serve as a hotel. Be realistic about your true needs. In the rare event an unusually large number of guests arrive on your doorstep, you can always borrow from friends, family or neighbors.

9. Do not de-clutter things that are not yours

Everyone should have a choice about their own belongings, even small children. Honor them by allowing them to choose. You can encourage hoarding tendencies in others by ripping things away from them before they are ready to let go.

10. Do not waste your life on clutter

Every item you own takes time out of your life: time to manage it, clean it, repair it, and maintain it; time to choose between objects of a similar category; time spent shopping for it… and that doesn’t even mention the time spent earning the money to pay for it in the first space. Decide to sacrifice less of your precious life on the pursuit and ownership of stuff.


These ten principles have kept me resolute for the past three years. I had no idea when I began this mission how much stuff I would relinquish over the next three years. What I originally thought was going to be an arduous task quickly became a way of life… so much so, we have just put a deposit on a beautiful, even smaller, apartment with fabulous views of our coastal city, a swimming pool, and gym all within walking distance of everything we want. Semi-retirement is becoming a beautiful thing. De-cluttering made it possible.


Search for a Topic

Follow us on Facebook

This message is only visible to admins.

Problem displaying Facebook posts.
Click to show error

Error: Error validating access token: Sessions for the user are not allowed because the user is not a confirmed user.
Type: OAuthException
Subcode: 464
Solution: See here for how to solve this error

Connect with us on facebook